Static Site Generation (SSG) is great. It allows faster response time to users and enhanced SEO capabilities. I use SSG for all my websites, including an e-commerce store that I built for our family business. The website uses NextJS and Hygraph. While everything ran great with SSG, the ongoing inflation triggered some problems by frequently varying prices. To update the price of an item, this was my workflow:
- Update the price in Hygraph
- Publish the content
- Trigger static site rebuild on Vercel
Since the price change only affected a few pages, rebuilding the entire website is an unnecessary task. Fortunately, Incremental Static Regeneration (ISR) comes to our rescue. ISR can be triggered either periodically, or, on-demand. In this article, I will go through my idea of the solution and how I implemented it.
The Idea
My idea was to do every step of the process in a single place. It would be Hygraph, as the price editing happens there. I imagined the following workflow:
- Update the price in Hygraph
- Publish the content
- Click a button somewhere in the Hygraph content editor to trigger ISR on the pages affected
Thanks to the Hygraph UI Extensions (UIX, currently in preview), which enhances its UI functionality, this workflow was possible. I decided to use them with the following mechanism:
- The website provides a
POSTendpoint (say/api/revalidate) to trigger ISR - The UIX provides a button, on clicking which, calls the endpoint with the current object data in the body
Building the Hygraph UIX
Before building the UIX, I doubted whether it can access the current object being edited. @cadudecastroalves from Hygraph Community cleared my doubt and pointed me to the documentation.
Hygraph UIX is essentially a React application, which gets rendered inside the Hygraph editor UI. I initially bootstrapped the project with Vite and found that Hygraph could not connect to the extension in the development mode. Since it was a known problem, I decided to go with CRA.
To get started, I just had to install
@hygraph/uix-react-sdk
package and import Wrapper and useFormExtension from it. Using them, the
UIX skeleton would look like,
import {
  Wrapper,
  useFormSidebarExtension,
  FormSidebarExtensionDeclaration,
} from "@hygraph/uix-react-sdk"

const declaration: FormSidebarExtensionDeclaration = {
  name: "Name your UIX here",
  description: "Describe what your UIX does",
  extensionType: "formSidebar", // This extenstion will appear at the sidebar
  config: {
    // Declare any user-defined values that you are going to need in your UIX
  },
}

function SidebarComponent() {
  // form contains the state of the current object being edited in the Hygraph
  // extenstion contains UIX metadata, along with config values
  // model contains the information about the model of which current object is
an instance of
  const { form, extension, model } =
    useFormSidebarExtension()
  // Do something useful using the form and extension variables
  // You can use useEffect() with form as a dependency to listen to changes
  return <p>Your UI goes here!</p>
}

function App() {
  return (
    <Wrapper declaration={declaration}>
      <SidebarComponent />
    </Wrapper>
  )
}

export default App
For my use case, I had the following config variables:
ENDPOINT— The endpoint on which to triggerPOSTAPI_KEY— The secret to be added in theAuthorizationheader
I also added several state variables to the skeleton:
-
A boolean state variable
dirtyto check if the form had been modified -
An object state variable
valuesto store the value of the current object being edited in Hygraph -
An effect depending on the
formto updatedirtyandvalues -
A callback to call
ENDPOINT -
A boolean state variable
loadingset true if an API call is in progress -
A string state variable
messageto notify the user of the result of the API call.
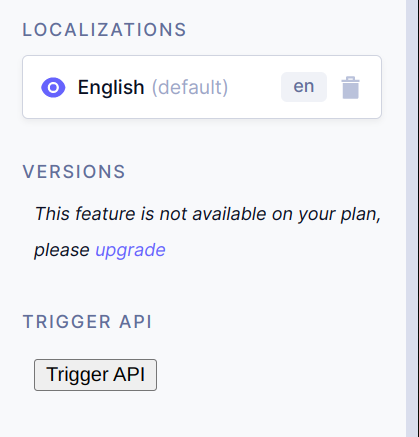
The UI was very simple, containing a button to trigger the callback, and a
paragraph to display the message. In the end, the UIX config looked like
this:
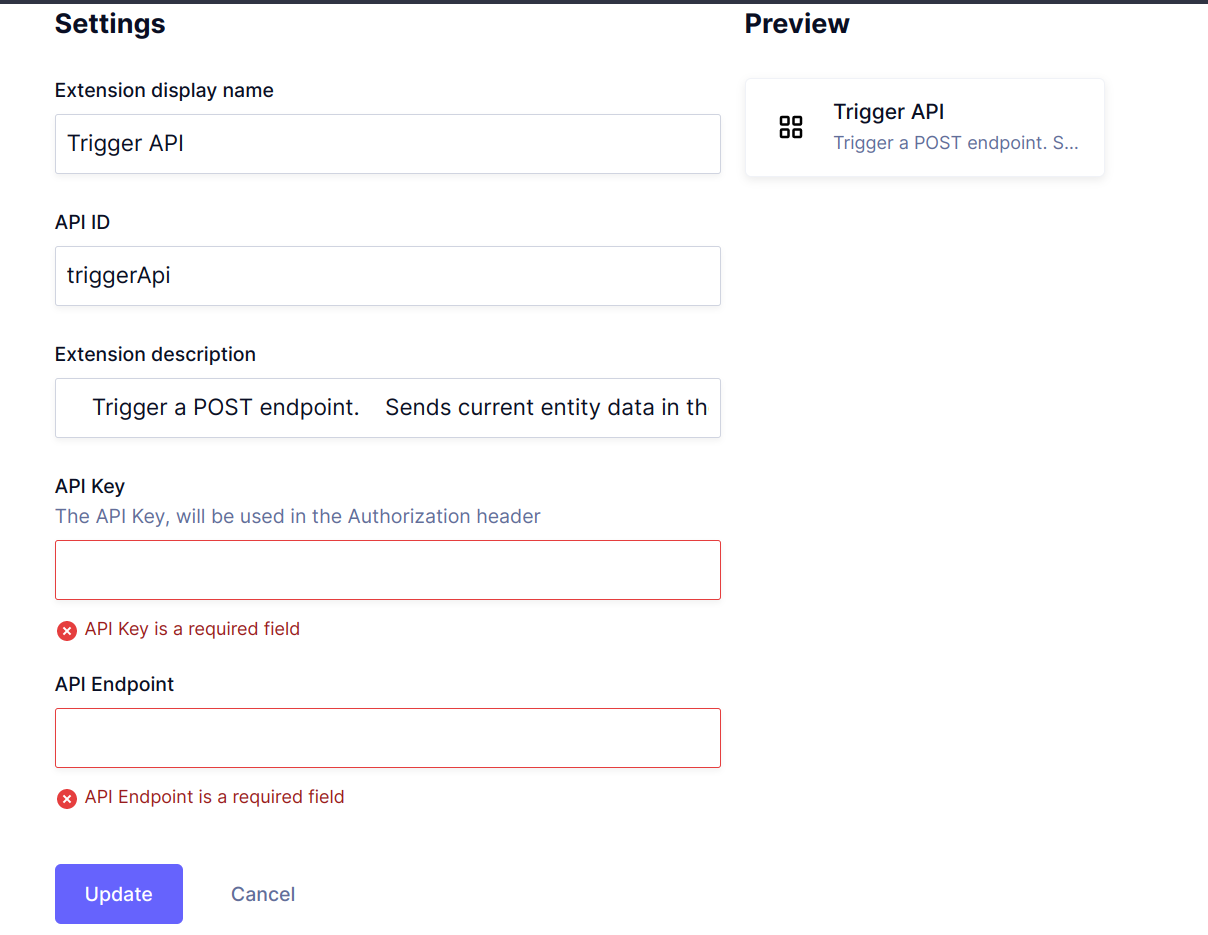
The UIX UI was simple:
The UIX source is available at GitHub; you can also install the extension available at hygraph-uix-trigger-api.vercel.app from Hygraph settings.
The ISR Handler
With the extension in place, it was time to implement the ISR handler! In
NextJS, the ISR handler is a normal API handler that triggers the unstable_revalidate() function on the response object. This function takes a
path as the input and triggers ISR. For security purposes, it is good to use a
secret as the authentication mechanism, to control the triggers of the API.
Since the UIX sends the whole object being edited, it was necessary to type (at
least a part) of them in the ISR handler. At Hygraph, I had Product and
Category schemas, each containing a slug field and were related two-way. I
also had the Info schema, as a key-value pair. The typings looked like this:
type HasSlug = { slug: string }

// This is how Hygraph defines relationships
type HygraphReference<T extends string, K> = {
  [key in T]: {
    connect: K[]
    disconnect: K[]
  }
}

type ProductRevalidateData = HasSlug &
  HygraphReference<"categories", HasSlug>

type CategoryRevalidateData = HasSlug &
  HygraphReference<"products", HasSlug>

type RequestData =
  | ({ model: "Product" } & ProductRevalidateData)
  | ({ model: "Category" } & CategoryRevalidateData)
  | { model: "Info" }
I also had a getPaths(req: RequestData): string[] method to return a list of
all paths to be revalidated. The method would calculate the paths based on the
request data being sent from the Hygraph. With this method in place, the ISR
handler was as simple as:
export default async function handler(
  req: NextApiRequest,
  res: NextApiResponse<ResponseData>
) {
  if (req.method === "POST") {
    const authToken =
      req.headers["authorization"]?.split(" ")[1]
    if (authToken !== process.env.REVALIDATION_TOKEN) {
      res.status(401).end()
      return
    }
    const request: RequestData = JSON.parse(req.body)
    const paths = getPaths(request)
    await Promise.all(
      paths.map(path => res.unstable_revalidate(path))
    )
    res.status(200).send({ success: true })
  } else {
    res.status(204).end()
  }
}
While testing this code, I spent around half an hour debugging the ISR not
triggering. It was due to missing await Promise.all() around
res.unstable_revalidate() calls 😅.
Caveats and Possible Improvements
The Hygraph UIX calls the API by using fetch(). While doing the API call, the
Origin header will be set to the domain at which the UIX is hosted. If the
CORS is not enabled at the API server, the browser will block the request. To
handle this, I had to set CORS headers in the API response as:
res
  .setHeader("Access-Control-Allow-Origin", "*")
  .setHeader("Access-Control-Allow-Methods", [
    "POST",
    "OPTIONS",
  ])
  .setHeader("Access-Control-Allow-Headers", [
    "authorization",
    "content-type",
  ])
This will set the headers for all HTTP methods, even though the browser will
call only POST and OPTIONS. In case modifying the server configuration to
enable CORS is not possible, the UIX can use mode: "no-cors" in the
fetch(), at a cost of making the response
opaque.
When the Hygraph UIX supports Vite during the development, I plan to migrate the project to Vite, for a nice DX. Apart from that, the UIX can also have an option to specify resource paths, when adding to the sidebar of a model. Feel free to open a PR if that is the use case that you need!
Thanks
@cadudecastroalves for helping me to get started on Hygraph UIX